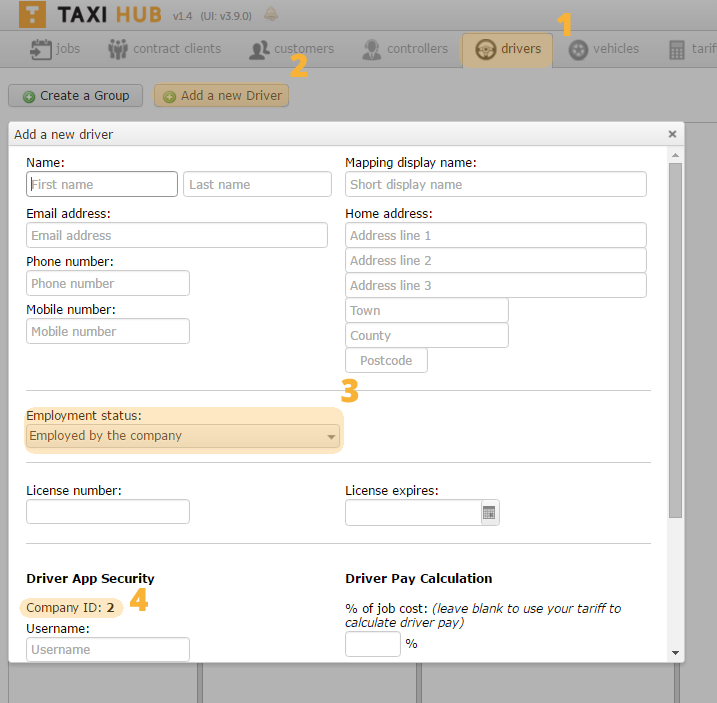
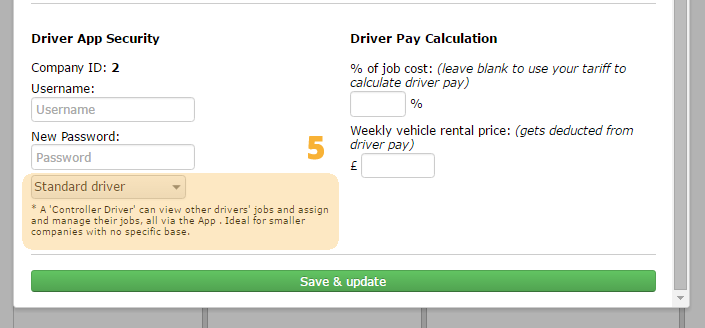
Navigate to the ‘drivers’ tab at the top of your screen. Once this tab is open you will see the following which is two screen shots as the form scrolls down.
Every field is important, but we have just added an explanation here of some of the key areas.

1 – This is the tab to click on to be taken to the drivers area.
2 – Click here to add a new driver. On clicking this link the “add new driver” box will open.
You need to fill in as many fields as possible to get the most out of the system.
Mapping Display Name will be used to help identify your driver on the live map within Taxi Hub.
3 – The employment status box allows you to identify whether the driver is self employed or employed. Selecting self employed will allow the driver to take payments them self, either via the driver app or the payment gateway within the add jobs area of Taxi Hub.
4 – Company ID needs to be noted as this is required to set up the driver app.
5 – You can select standard driver or controller driver. A “controller Driver” can view other drivers’ jobs and assign and manage their jobs via the App. this is ideal for smaller firms.

Once you have added the necessary information click save and update.
